Showing posts with label How tos. Show all posts

Wednesday, December 8, 2010

How to save a document (.doc) as PDF or XPS in office 2007

Microsoft's new office 2010 released with a bundle of added features to office 2007. The compatibility is there that a document which is edited in office 2007 can be saved as office 97-2003 document so that it can be opened in office 98 or 2003.


But by default there is no option is provided in office 2007 that to save a document in a .pdf format. To get that option we need to install extra plug-in. which is later released by Microsoft called

You can download that plug in from here: SaveAsPDFandXPS.


Just it is a 934 KB. plug in. simply download and install then open office 2007. you will see a extra option is added in save as options menu. 
That's it.. now you can save a document to a .pdf or .xps format.


Don't forget to subscribe TRICKS HEAVEN. It would be a honor to us.

Share/Bookmark

Tuesday, December 7, 2010

How to delete product key from registry in windows 7


     You might be knowing that there are plenty of softwares available to find the product key of windows OS like Windows key finder , LicenceCrawler etc..which find the product key in less than a second.

 First backup your key  then it is a good idea to remove your product key from registry when you are sharing your pc with others, or some one may not find it using softwares mentioned earlier and mis use it.. or if you want to hide your key form other.. 

If you want to do so , then follow the simple steps, you can delete the product key just by using a command.

Open command prompt with admin rights, to do so navigate to command prompt in accessories and right click and choose "Run as administrator" or short cut is type CMD in start menu search bar and hit  Ctrl+Shift+Enter.


Then in command prompt type the following command and hit enter
slmgr -cpky

Wait for some time, you will see a message saying " product key from registry cleared successfully" 


YOU ARE DONE. 

Share/Bookmark

Sunday, November 21, 2010

listen song from youtube with out launching browser

       While i was working with my document i thought of listening songs . I searched for my favorite song on my local drive, but it wasn't neither in my i-tunes library or on my disk. I was not interested at that time on launching browser,opening youtube or any and playing song.
I got a doubt that can't we play any song from youtube with out launching browser?

I searched for that and found a solution, that yes we can listen to our favorite songs from youtube with out launching browser. That which made me possible is QUISPLE.

Download Quisple
or visit: www.snapfiles.com

Download Quisplewhich is freeware.

Install it , type your song with title, hit enter, that's it.. it will play song directly from youtube with out launching browser.


Share/Bookmark

Wednesday, November 10, 2010

How to rename default "new folder"

Rename the Default "New Folder" Name When you click on the right-button to create a new folder. The Folder is automatically named "New Folder".
Why Can't we change it to "My Folder" or "my stuff" or whatever name?

I searched it, it took 2hrs until I found the best answer:

Go to Google, and search for "Resource Hacker"
Run the program and open Shell32.dll in "X:\Windows\System32\" ,where X refers to your System Drive.

Navigate to: Strings\ 1896\ 1030

You will find in the right pane ?New Folder?. Change it to "Confidential" or "Harry", whatever you like!

Choose "Compile Script" from the Menu. Save it as shell32.dll in the desktop, but beware of saving it in "X:\Windows\System32\"

Go to Google, and search for "Replacer"
Run the program, drag Shell32.dll in "X:\Windows\System32 \" and drop it on Replacer's window, then press enter.

Drag the Shell32.dll that you saved in the desktop and drop it on "Replacer's" window and press enter.
The Replacer will prompt you to agree, press y then press enter.

Restart your computer to see changes.

All Done!

I found that solution at "riteshhowto.wordpress.com"
The article title was: "Rename New Folder."


Share/Bookmark

Sunday, October 31, 2010

How to remove Windows Genuine notice in windows 7

If your windows 7 not licensed it is very common that you get WGA warning also called as "microsoft genuine notification" or "genuine warning"  in your system tray. If this your system is inserted with this notice your windows 7 screen will be blocked but WGA tray message.

How to detect whether your system is inserted by WGA notice??

  • you can see a small icon/notic which show the message saying "you may be victim of software counterfeiting this copy of windows did not pass windows genuine validation".
  • and your screen will be suspended.
  • a process called "wgatray.exe" will be running in task manager.
Then how to remove this warning? in xp we can remove it just by doing some registry modifications, if you want click here. Then how to do this in windows 7 ? here we got a tool that will permanently remove WGA warning called REMOVE WAT. which was developed by Hazar.


download Remove WAT OR  http://mods.myftp.org/Tools/Hazar/RemoveWAT.rar


After downloading the this tool, copy it to the C: disk and before launching you must have Administrator rights. After patching your system by clicking remove WAT, restart and you are done...! HAPPY ??


Note: we don't support using pirated softwares. Using pirates is a crime. This is only for Educational purpose only.
Share/Bookmark

How to remove Windows Genuine notice in xp

Have you ever updated your copy of windows? then you might also come to know that what is 'Genuine validation'. It is a technique used by Microsoft to detect it's Genuine products, provide better services and eliminate piracy. 


you might be wondering if you are using the pirated copy of windows OS, and trying to update your product then a tool will be installed to validate whether  the OS you are using is Genuine or not. If not it will show a notice in your system tray, and you might be annoying by seeing that message. It is something like "This copy of Windows is not Genuine you might be victim of software counterfeiting". The screen seems like below in xp.


This happens because of two actions...!
  • One is by Automatic Updates. If your connected to internet and your windows Automatic updates are on. 
  • second  if automatic updates are off, but you trying to update manually. 
Here I m showing how to get rid off this notice.


Note: Please note that , by removing this notice your copy of OS won't become Genuine but only you get rid off the message.


                If this Genuine notice is displayed in your tray means, a process called wgatray.exe  will be  running in your tray to  promt you continuously. If you are successful in removing that , think you are done..! 


Here is simple and strait forward method.


  1. launch windows task manager by pressing ctrl+alt+del.
  2. End wgatray.exe process in Task Manager. To end it right click on the process and choose 'end process'.
  3. Restart xp in safe mode. To start xp in safe mode restart xp and press F8.
  4. Delete WgaTray.exe from c:\Windows\System32.
  5. Delete WgaTray.exe from c:\Windows\System32\dllcache.                                                              you are almost done..! you need to edit your Registry to remove it completely.    
  1. To edit registry, press win+R or choose Run from start menu, and type 'regedit' and hit enter.  and browse : HKEY_LOCAL_MACHINE\SOFTWARE\Microsoft\
    Windows NT\CurrentVersion\Winlogon\Notify.
  2. Delete the folder ‘WgaLogon’ and all its contents.
  3. Reboot xp. you are done...!!!
Note: we "tricksheave"don't support using pirated products. This is only for education purpose only.


Share/Bookmark

Sunday, October 24, 2010

How to create bootable Kaspersky rescue disk10 (cd/USB)

            Due to the technological civilization and rapid groth of internet, using the internet became part of our day to day activity. With the same speed the virus attacks also increased to hack into our pc . I don't fear to say with loud voice that No anti virus can give 100% security to your pc in protecting against virus or malicious stuff.
           To protect your self and not to be a victim of these viruses you must install strong anti-virus on your pc. Due to some severe virus attacks, your may not even able to boot your pc. Because virus may reside in boot sector.
In such situation , you need to scan your pc using any "Bootable anti-virus" which runs right before your OS starts loading.

How to Get rid off:
To solve this problems, Kaspersky is providing a Bootable Anti-virus software called "Kaspersky Rescue Disk 10"  for free. 

To download free ISO file of Kaspersky Rescue Disk click here.

Download Rescue disk (ISO file) from above link and write it to a empty disk.
To fix your problem just boot your system with that disk....the software will scan your system and remove the virus which are stopping you to start your system.

Instead of writing ISO file to a disk you can make your USB disk as bootable Rescue Disk.

How to make Bootable Kaspersky USB Rescue Disk???

  1.   You can use your usb Rescue Disk to scan your system.To do so all you need to do is just download a "Kaspersky USB Rescue Disk Manager" from here and install it.


2. After you installed, browse the path of already downloaded "Kaspersky Rescue Disk 10" 
3. After specifying the path, you need to choose medium in which you are using to install this ISO. connect your USB and select it.(note: use only  FAT 16, FAT 32 formatted USBs)
4. Then press START button. you are done...!

Connect it to the system which is unable to boot due to severe virus attack, and restart it you are done...!

Download "Kaspersky REscue Disk 10"
Download "kaspersky USB Rescue Disk Manger"
Share/Bookmark

How to disable Windows xp boot screen

We can disable windows xp boot splash screen, so that the overall boot time will be reduced a bit. just by adding a line to boot.ini can disable the xp boot splash screen. a simple boot.ini file in xp looks like exactly as below...


Sample Boot.ini File:

This is a sample of a default Boot.ini file from a Windows XP Professional computer.
[boot loader]
timeout=30
default=multi(0)disk(0)rdisk(0)partition(1)\WINDOWS
[operating systems]
multi(0)disk(0)rdisk(0)partition(1)\WINDOWS="Microsoft Windows XP Professional" /fastdetect 
  • Edit boot.ini.

  • Add ” /noguiboot” right after “/fastdetect”.


  •  
Edited Boot.ini File:
[boot loader]
timeout=30
default=multi(0)disk(0)rdisk(0)partition(1)\WINDOWS
[operating systems]
multi(0)disk(0)rdisk(0)partition(1)\WINDOWS="Microsoft Windows XP Professional" /fastdetect 
/noguiboot

          After restarting, the xp boot splash screen will be gone. If you want to enable the boot screen again , just remove the newly added switch from boot.ini. Upon restarting, the splash screen will be gone. It can be re-enabled by removing the new switch. Here is the path how to reach boot.ini

    Edit the Boot.ini File

    To view and edit the Boot.ini file:
    1. Right-click My Computer, and then click Properties.
      -or-
      Click Start, click Run, type sysdm.cpl, and then click OK.
    2. On the Advanced tab, click Settings under Startup and Recovery.
    3. Under System Startup, click Edit.


Share/Bookmark

Friday, October 22, 2010

Install win-7 from USB

You might be knowing how to install win-7 from USB/DVD by using DISKPART command in RUN. If you want to know this method visit this page.
Here is a simple method how to install windows-7 from USB /DVD using a small tool called "Windows7-USB-DVD-too" provided by Microsoft.
To install win-7 you need a ISO file in disk and a USB stick. If you downloaded an ISO file under programm MSDNAA or from any other ways.


what you need: 

  • you need  ISO image of win-7 
  • A USB stick. (must use more than 2GB)            


  1. Download this tool from here
  2. prepare ISO file of win-7 using Nero or any iso creating software.
  3. Install it on your machine.
  4. In first step you need to choose the ISO file which you are created earlier click Next..
follow the instructions here..This tool make your pen drive bootable. 

Share/Bookmark

Wednesday, September 22, 2010

How to un-install Deep freeze

To uninstall the software Deep Freeze must first be disabled and then uninstalled.

To disable Deep Freeze:
1. Hold down the shift key and double-click on the Deep Freeze icon. Alternatively, you can press Crtl-Alt-Shift-F6. You should now see a password dialog.

2. Enter your password and click OK. If you have not yet entered a password you should be able to click OK without entering anything. You should now see a dialog with boot options.

3. Select "Boot thawed" and click OK. This will disable Deep Freeze on the next reboot.

4. Reboot your machine. After the machine reboots you are ready to uninstall Deep Freeze.


To uninstall:

1. Locate the installation file you used to install Deep Freeze to this machine. By default the name of this file is called "DF5Std.exe" for versions 5.X and "DF6Std.exe" for versions 6.X.

2. Run the installation file (DF5Std.exe or DF6Std.exe).

3. Select the option to "Uninstall"

4. The software should uninstall and reboot the machine. When the machine reboots, Deep Freeze should be uninstalled.


If u think it is use ful to you....plz comment on post...whether it is use ful or not....if u have any doughts plz write in comment field ......-u r's HARI
Share/Bookmark

Monday, February 22, 2010

How to install WINDOWS XP

U must know it ...becoz.....
  • U bought new HDD but you dont know how to install OS in it why to call some one to do it???
  • U want to format your system...due to seveior virus attack...
  • You replaced your hard disk drive with a new hard disk drive that does not have Windows XP installed.
  • You purchased a computer without an operating system.
Fortunately you do not need to be a computer export ...becoz...here is the complet help to install it..with screens... learn it and become export in installing OS.....

TO INSTALL XP CHECK FOR FOLLOWING MUST WITH YOU::
  • You have the Windows XP CD.You have the product key available. The product key is located on your Windows XP CD case and is required to install and activate Windows XP.
  • Your computer must connectd with mouse, key-board, pre -installed cd/dvd drive in working condition
  • you must have xp drivers with you..
  • ( Drivers are software that Windows XP uses to communicate with your computer’s hardware)
INSTALLATION PROCESS:
Part 1: Begin the installation
1.Insert the Windows XP CD into your computer and restart your computer.
2.If prompted to start from the CD, press SPACEBAR.
If you miss the prompt (it only appears for a few seconds),
restart your computer to try again.


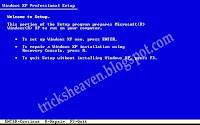
3. Windows XP Setup begins. During this portion of setup,
your mouse will not work, so you must use the keyboard.
On the Welcome to Setup page, press ENTER.


4. On the Windows XP Licensing Agreement page,
read the licensing agreement.
Press the PAGE DOWN key to scroll to the bottom of the agreement.
Then press F8.


5.This page enables you to select the hard disk drive on which Windows XP
will be installed. Once you complete this step, all data on your hard disk drive
will be removed and cannot be recovered. It is extremely important that
you have a recent backup copy of your files before continuing.
When you have a backup copy, press D, and then press L when prompted.
This deletes your existing data.
6.Press ENTER to select Unpartitioned space, which appears by default.


7. Press ENTER again to select Format the partition using the NTFS file system,
which appears by default.


8.Windows XP erases your hard disk drive using a process called formatting and then
copies the setup files. You can leave your computer and return in 20 to 30 minutes.


9. Windows XP restarts and then continues with the installation process.
From this point forward, you can use your mouse. Eventually,
the Regional and Language Options page appears. Click Next to accept the
default settings. If you are multilingual or prefer a language other than English,
you can change language settings after setup is complete.


 10.On the Personalize Your Software page, type your name and your
organization name.Some programs use this information to
automatically fill in your name when required.
Then, click Next.


11. On the Your Product Key page, type your product key as it appears on your
Windows XP CD case. The product key is unique for every Windows XP installation.
Then, click Next.


12. On the Computer Name and Administrator Password page, in the Computer
name box, type a name that uniquely identifies your computer in your house, such as
FAMILYROOM or TOMS. You cannot use spaces or punctuation. If you connect
your computer to a network, you will use this computer name to find shared files and
printers. Type a strong password that you can remember in the  
Administrator password box, and then retype it in the Confirm password box.
Write the password down and store it in a secure place. Click Next.


13. On the Date and Time Settings page, set your computer’s clock.
Then, click the Time Zone down arrow, and select your time zone. Click Next.


14. Windows XP will spend about a minute configuring your computer.
On the Networking Settings page, click Next.


15.On the Workgroup or Computer Domain page, click Next.


16.Windows XP will spend 20 or 30 minutes configuring your computer
and will automatically restart when finished. When the Display Settings
dialog appears, click OK.


17.When the Monitor Settings dialog box appears, click OK.


18.The final stage of setup begins. On the Welcome to Microsoft Windows page,
click Next.


19.On the Help protect your PC page,
click Help protect my PC by turning on Automatic Updates now.
Then, click Next.


20.Windows XP will then check if you are connected to the Internet:
If you are connected to the Internet, select the choice that describes
your network connection on the Will this computer connect to the Internet directly, 
or through a network? page. If you’re not sure, accept the default
selection, and click Next.


If you use dial-up Internet access, or if Windows XP cannot connect to the Internet,
you can connect to the Internet after setup is complete.
On the How will this computer connect to the Internet? page, click Skip.


21.Windows XP Setup displays the Ready to activate Windows? page.
If you are connected to the Internet, click Yes, and then click Next.
If you are not yet connected to the Internet, click No,
click Next, and then skip to step 24. After setup is complete,
Windows XP will automatically
remind you to
activate and register your copy of Windows XP.


22.On the Ready to register with Microsoft? page, click Yes, and then click Next.


23.On the Collecting Registration Information page, complete the form. Then, click Next.


24 On the Who will use this computer? page, type the name of each person who
will use the computer. You can use first names only, nicknames, or full names.
Then click Next. To add users after setup is complete or to specify a password to
keep your account private, read Create and customize user accounts

25.On the Thank you! page, click Finish.


FOR MORE VISIT : www.microsoft.com

Share/Bookmark